고정 헤더 영역
상세 컨텐츠
본문
Transforming the exterior of your home doesn't always require a hefty budget or professional help. With the right tools, materials, and a bit of DIY spirit, you can give your home a fresh look by installing siding on your own. In this comprehensive guide, we'll explore the world of DIY siding, covering everything from material choices to installation techniques, expert advice, and real-life success stories.
The Benefits of DIY Siding
Cost Savings
One of the primary advantages of tackling a siding project yourself is the potential for significant cost savings. By eliminating labor costs, you can allocate more of your budget to high-quality siding materials, enhancing both aesthetics and durability.
Personalization
DIY siding allows you to personalize the exterior of your home according to your preferences. Choose from a variety of siding materials, colors, and styles to create a look that complements your home's architecture and your personal taste.
Choosing the Right Siding Material
Vinyl Siding
Vinyl siding is a popular and cost-effective choice for DIY projects. It's durable, low-maintenance, and comes in a variety of colors and textures. Vinyl siding is known for its versatility and ease of installation, making it suitable for DIY enthusiasts.
Fiber Cement Siding
Fiber cement siding combines the durability of cement with the appearance of wood. While it requires more precision during installation, its resistance to pests and fire makes it an attractive option for those seeking a long-lasting and low-maintenance siding solution.
Tools and Materials You'll Need
Siding Panels
Choose siding panels in your preferred material, ensuring they match the dimensions of your home's exterior. Consider purchasing a bit extra to account for any mistakes or future repairs.
Nails and Fasteners
Invest in high-quality nails or fasteners designed for your chosen siding material. Using the right fasteners is crucial for the stability and longevity of your siding installation.
Saw and Cutting Tools
A saw or cutting tools specific to your siding material will be necessary for trimming panels to fit around windows, doors, and corners. Accuracy in cutting is essential for a professional-looking finish.
DIY Siding Installation: Step-by-Step Guide
1. Prepare the Surface
Ensure the exterior surface of your home is clean, dry, and free of any existing siding or debris. Repair any damaged areas and apply a weather-resistant barrier to protect against moisture.
2. Measure and Plan
Accurate measurements are critical for a seamless siding installation. Measure the height and width of each wall, accounting for doors, windows, and any other openings. Plan the layout to minimize the number of seams and joints.
3. Install Starter Strips
Attach starter strips along the bottom of the walls to provide a level base for the first row of siding panels. Ensure the starter strips are securely fastened and level to prevent alignment issues.
4. Install Corner Posts and J-Channel
Install corner posts at the corners of your home and J-channel around windows and doors. These elements provide a finished look and create clean lines for the siding installation.
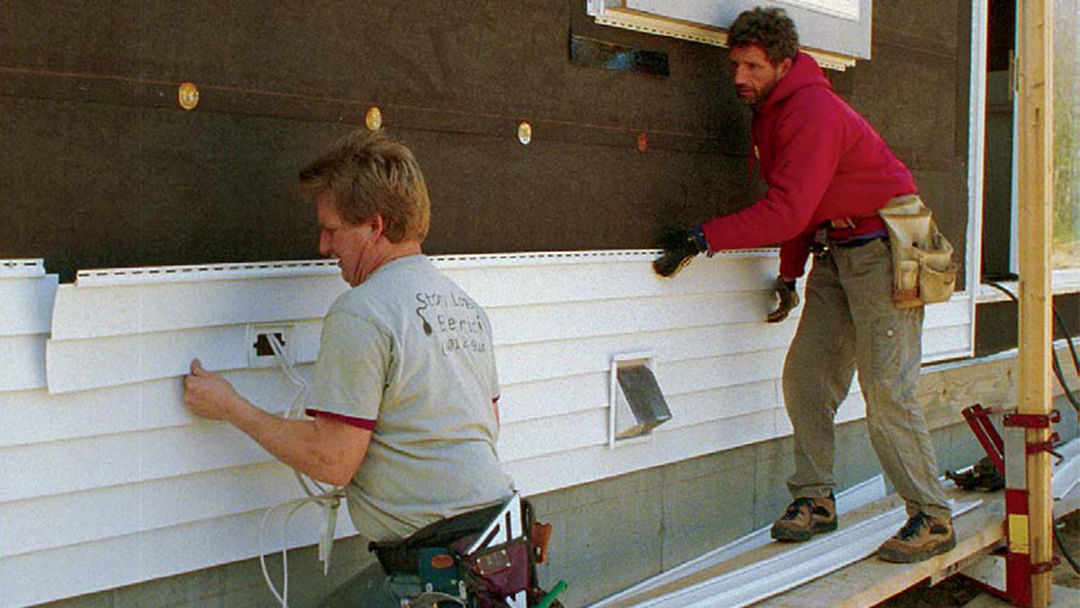
5. Begin Siding Installation
Start installing siding from one corner and work horizontally, ensuring each panel overlaps the previous one. Nail the panels in place according to the manufacturer's guidelines, leaving room for expansion and contraction.
6. Trim and Finish
Use a saw or cutting tools to trim siding panels around windows, doors, and corners. Install finishing pieces, such as trim and molding, to complete the look and provide additional protection against the elements.
Expert Insights on DIY Siding
Home Improvement Specialist's Tips
"Choose a siding material that matches your climate. Certain materials, like vinyl, perform well in various conditions, while others may require additional maintenance in specific climates."
- Emily Harris, Home Improvement Specialist
Architect's Perspective
"Consider the architectural style of your home when selecting siding. The right siding can enhance the overall aesthetic and even add value to your property."
- Michael Turner, Architect
Real-Life DIY Siding Success Stories
Sarah's Vinyl Makeover
Sarah, a DIY enthusiast, transformed her home with vinyl siding. "The installation process was straightforward, and the results were incredible. The new siding not only improved the appearance but also added insulation to my home."
John's Fiber Cement Adventure
John opted for fiber cement siding for its durability. "While it required a bit more precision, the end result was worth it. The fiber cement siding gave my home a modern and sophisticated look."
Addressing Common Concerns
Weather Considerations
Choose a suitable time for your DIY siding project, considering weather conditions. Mild temperatures and clear skies are ideal for an efficient and smooth installation process.
Professional Consultation
If you're uncertain about any aspect of the installation or encounter unexpected challenges, consult with a professional for guidance. It's better to seek advice than risk compromising the integrity of your siding.
Conclusion: Your Home, Your DIY Masterpiece
Embarking on a DIY siding project is a rewarding journey that allows you to take control of your home's exterior aesthetics. By carefully selecting materials, following expert advice, and learning from real-life success stories, you can achieve a professional-looking result while enjoying the satisfaction of a job well done.
'DIY' 카테고리의 다른 글
| Illuminate Your Space: The Art and Science of DIY Neon Signs (0) | 2024.02.22 |
|---|---|
| Unlock Your Green Thumb: Creative and Affordable DIY Garden Ideas (0) | 2024.02.22 |


